

Creating a Distribution List with Microsoft 365 Groups:
Microsoft 365 Groups can be used as distribution lists, but they offer additional collaboration features like shared calendars, SharePoint
sites, and more. Here’s how to create a distribution list using Microsoft 365 Groups:
- Sign in to Office 365: Sign in to your Office 365 admin account.
- Access the Microsoft 365 Admin Center: Go to the Admin center and select “Groups.”
- Create a New Group:
a. Click the “Add a distribution list” button.
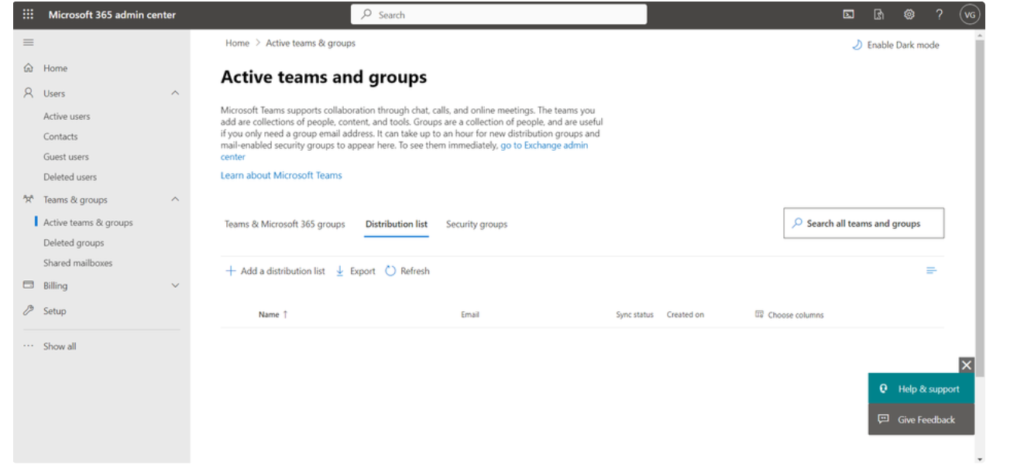
b. Choose “Distribution” under “Group type” and follow the on-screen instructions to provide a name, email address, and other settings.
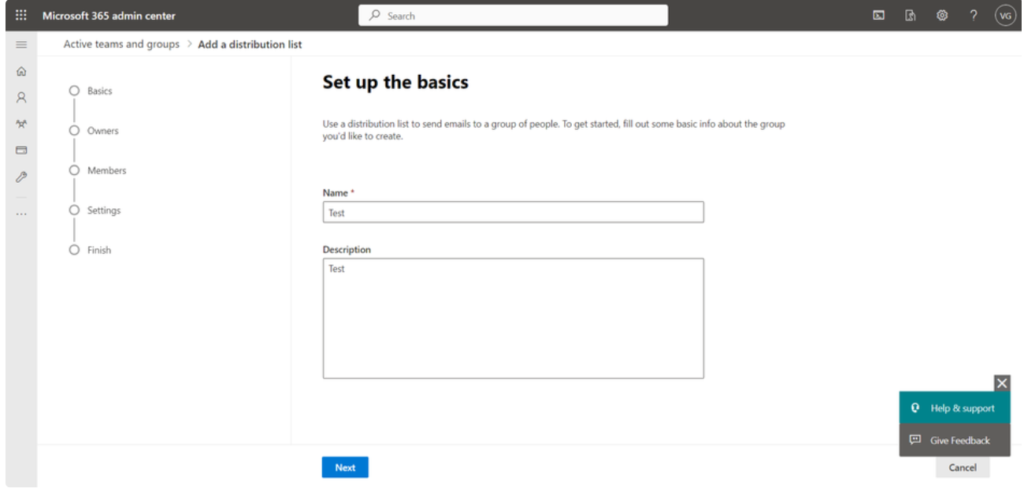
Click Next
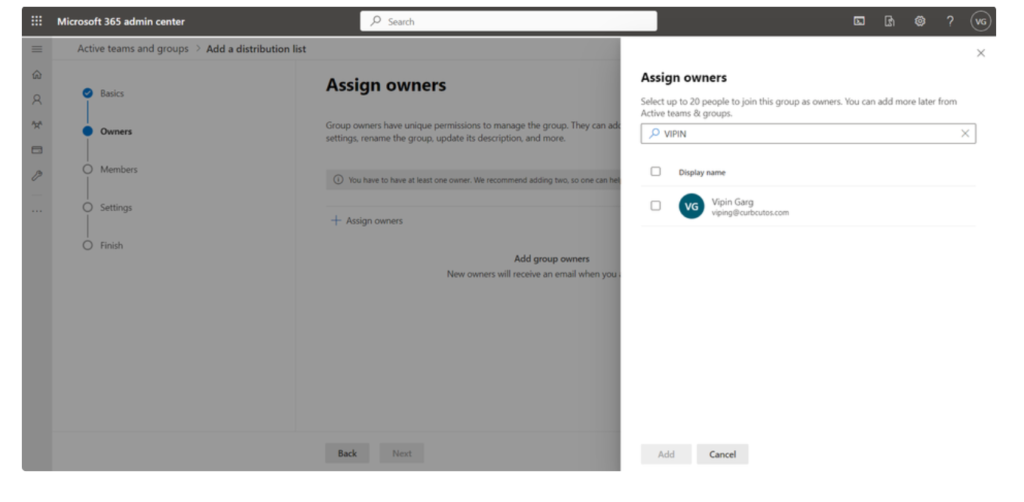
Click on Assign owner & search for the user & click on add.
- Add Members:
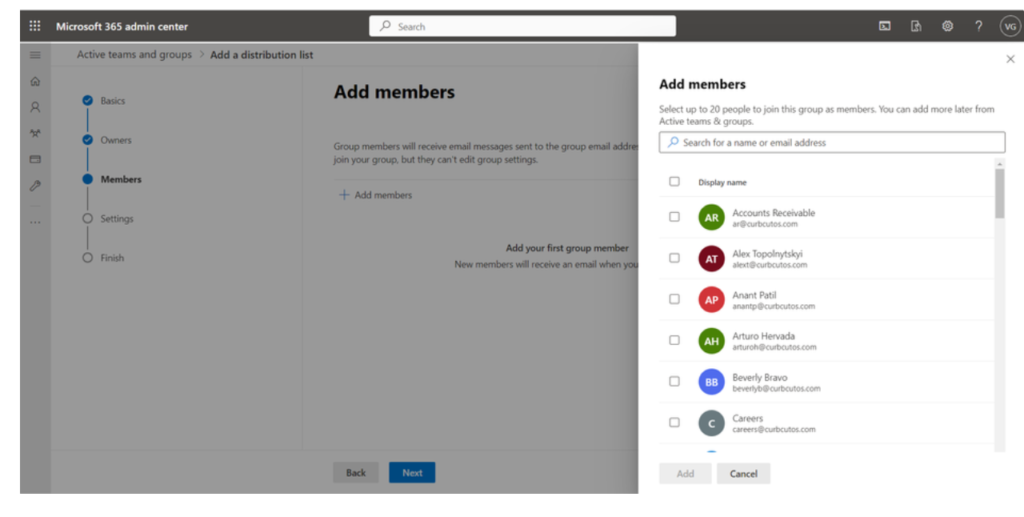
b. In the group settings, go to “Members” and add members from your organization’s directory.
- Choose email name you want for the distribution list
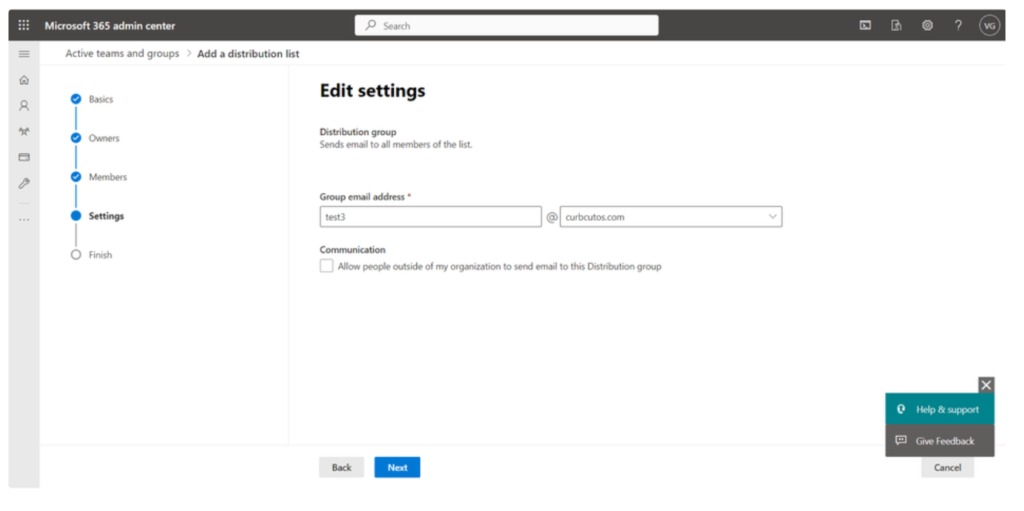
Click on the option “Allow people outside of my organization to send email to this Distribution group” as per the requirement.
- Save and Use:
a. Save your changes, and the Microsoft 365 Group can be used as a distribution lists.


")